

Only visible to users with all three of: administrative Tenant Management, System Configuration, and Privileged Accounts Management permissions.
Multi-Tenant mode: settings on this tab are unique per tenant.
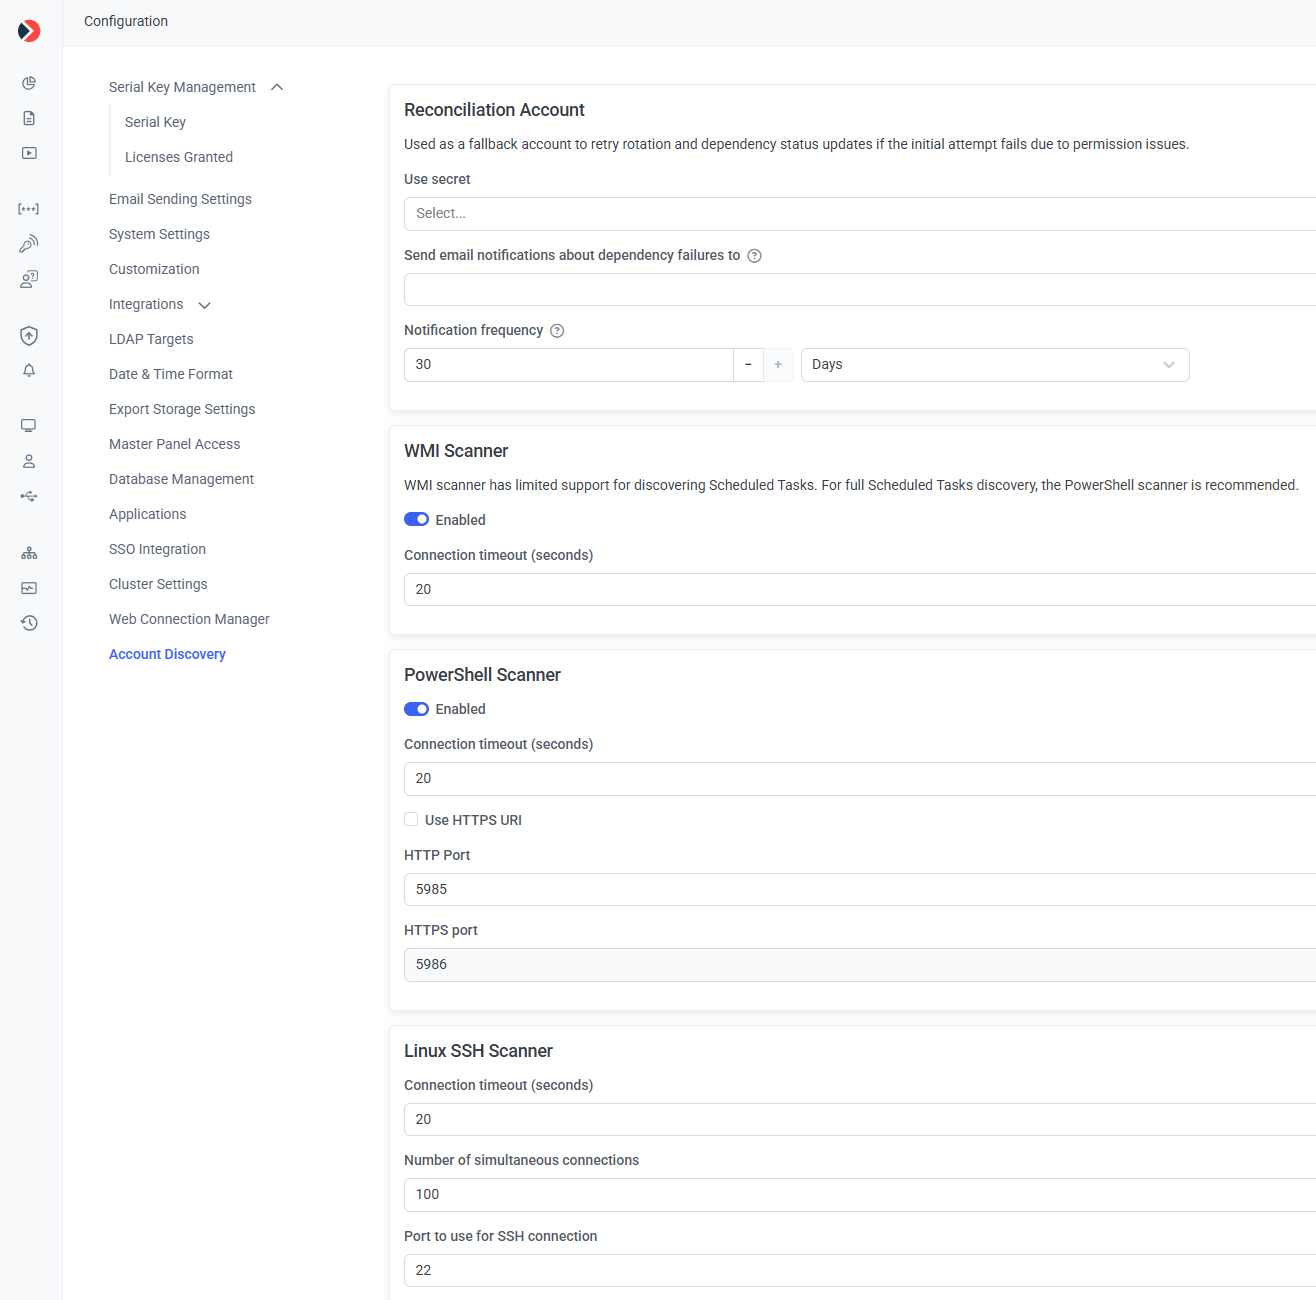
The Account Discovery tab on the Configuration page.
1. Configure the reconciliation account
The reconciliation account is a fallback account (typically a domain admin) Syteca uses to retry password rotation and dependency restart/stop operations if the initial attempt fails on permissions. See Onboarding workflow and retry logic for how it’s used.1
Open Account Discovery settings
Log in as a user with the administrative Tenant Management, System Configuration, and Privileged Accounts Management permissions. Click Configuration, then select the Account Discovery tab.
2
Select the reconciliation secret
In the Reconciliation Account section, use Use secret to select one or more Active Directory account secrets. Only secrets where you’re the Owner are available.
3
Save
Click Save.
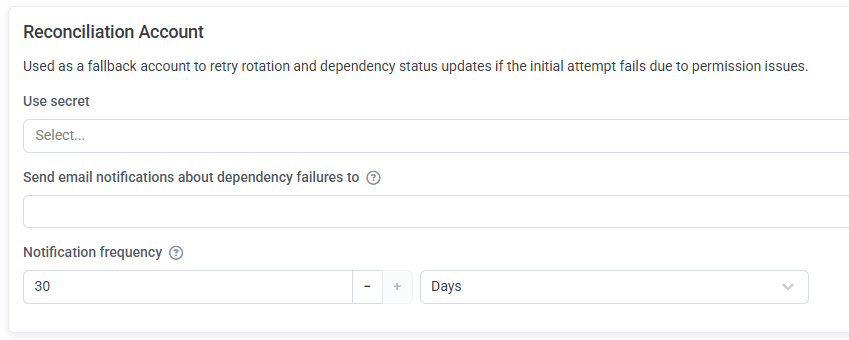
The Reconciliation Account section.
2. Configure dependency failure notifications
The same section also configures email notifications for when a dependency restart/stop fails during password rotation.1
Enter recipients
In Send email notifications about dependency failures to, enter one or more addresses, separated by semicolons.
2
Set the notification frequency
In Notification frequency, enter a numeric value and choose a unit:
3
Save
Click Save.
Switching units resets an out-of-range value to that unit’s default. An out-of-range value shows a warning (for example, “Please enter a value greater than or equal to 30 and less than or equal to 1440.”). A failure notification always sends immediately when a failure occurs, in addition to the recurring notification on this schedule. If no address is specified, no notifications are sent. Addresses are validated against standard email format.
If Health Monitoring Notifications is also enabled, dependency failures are additionally grouped into those notifications, on top of the dedicated ones configured here.
3. Configure the WMI Scanner
Controls the WMI scanner used during Computer Discovery scans to detect privileged Windows local accounts.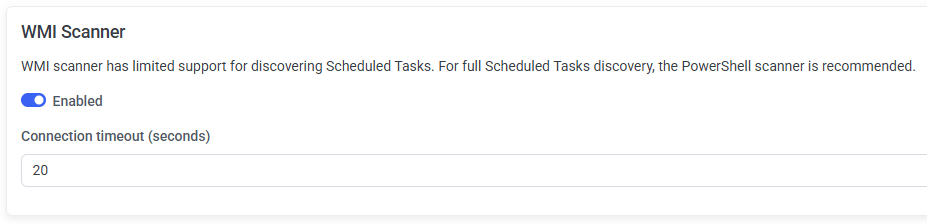
The WMI Scanner section.
Connection timeout (seconds) is disabled while Enabled is off. Leaving it empty shows “The field is required.” on Save. The WMI scanner has limited Scheduled Tasks discovery — for full coverage, use the PowerShell scanner.
4. Configure the PowerShell Scanner
Controls the PowerShell-based scanner used during Computer Discovery scans.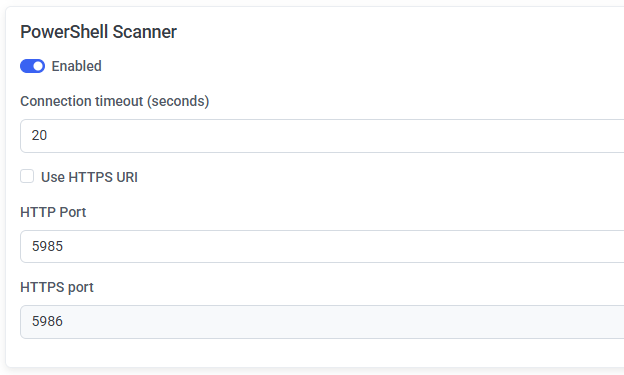
The PowerShell Scanner section.
Connection timeout (seconds) is disabled while Enabled is off, and required when visible. HTTP port and HTTPS port are mutually exclusive based on Use HTTPS URI.
5. Configure the Linux SSH Scanner
Controls the SSH scanner used during Linux Discovery scans.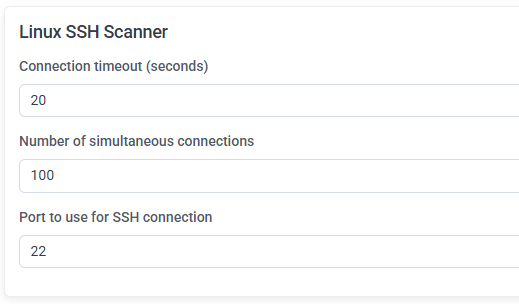
The Linux SSH Scanner section.
If any of the three fields is left empty, Save shows “The field is required.” An out-of-range value shows “This field must be between and .” Switching a field’s unit resets an out-of-range value to that unit’s default.
6. Audit Log events
Changes on this tab are recorded in the Audit Log:7. Upgrade from a previous version
In earlier Syteca versions, the WMI Scanner, PowerShell Scanner, and Linux SSH Scanner settings were configured directly in the Application Server configuration file. After upgrading to a version with this Configuration tab, these settings are managed exclusively through the Management Tool here.Related
Service Account Dependency Discovery
The end-user workflow these settings support.
Account Discovery overview
Discovery rule types and running scans.
WMI and PowerShell scanning
Prerequisites for the scanners configured here.
Linux SSH scanning
Prerequisites for the Linux SSH Scanner.