

When monitoring the GUI for X11 sessions is enabled, this feature is only available for sessions started using a remote SSH terminal.
Two restriction modes
Allow access without approval during work hours is available for Windows and Linux Clients. If GUI monitoring is enabled for X11 sessions, it only applies to sessions started over remote SSH - not local X11 sessions.
Add a restricted user
1
Open Endpoint Access Control
Sign in to the Management Tool with the User Management administrative permission, click Access Requests, select the Endpoint Access Control tab, and click Add.
2
Choose the restricted user
On the General tab, in User with Restricted Access Rights, select the User type and then the specifics:
- Active Directory user - select the Domain and the User / User group.
- Local computer user - select the Computer name and User login.
- Syteca user for secondary authentication - select the User login. (Required if secondary user authentication is enabled on any Client the user logs in to.)
- Linux user - select the User login.
3
Choose the accessed computers
In Accessed Computer with Installed Client, select a Computer Type:
- Any computer - restrict access to all computers (Linux user or Syteca secondary-auth user).
- Selected computer - a specific computer or computer group (AD or secondary-auth user); select the domain and computer/group.
- Computers from Client group - a specific Client group (AD, Linux, or secondary-auth user).
Access is only restricted on computers that have a Client installed.
4
Choose the Approvers
In Users Who Can Approve Access, select the trusted users who can approve this user’s requests - from the email link they receive or on the Access Requests tab.
Approvers need a correct email address on their user account. By default, a request not processed within 30 minutes expires; change this in System Settings on the Configuration page.
5
Pick the restriction type
On the Restriction Types tab, choose your mode:
- Always require approval
- Only outside work hours
Select Always require approval on login. The user needs Approver sign-off every time they log in.
6
Save
Click Save. The user appears in the grid and the restriction applies on their next login.
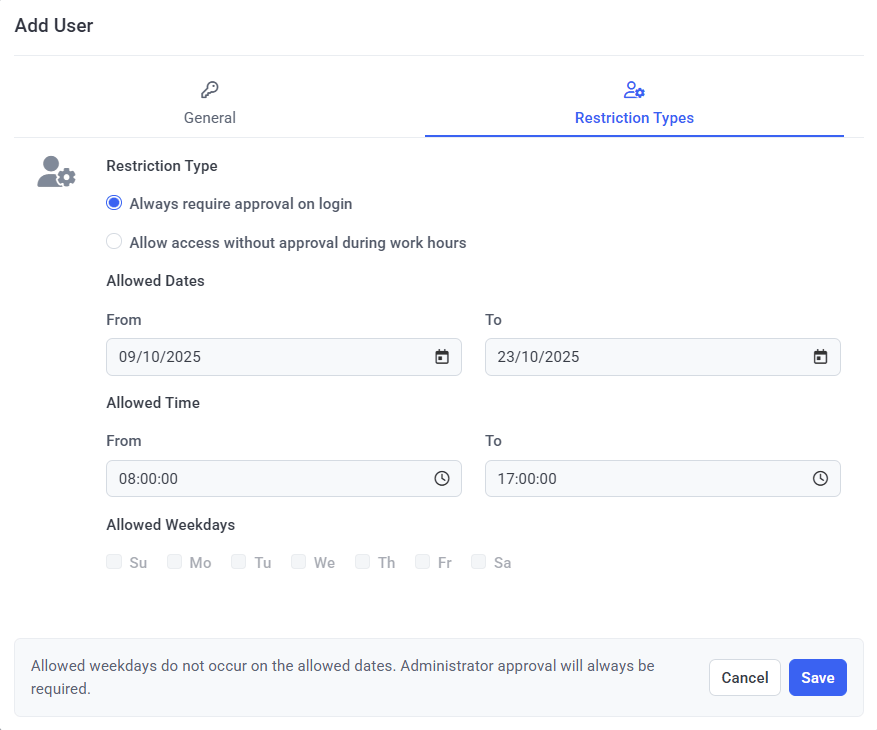
Choosing the restriction type when adding a restricted user.
Edit a restriction
Click the user’s row in the grid on the Endpoint Access Control tab, change any setting across the General and Restriction Types tabs - including switching between the two restriction modes - and click Save.Remove a restriction
Select the user’s checkbox in the grid and use the Remove action (or the remove icon on the row). The user can then log in without approval. (Removing a restriction does not delete the user from Syteca; it only lifts the login restriction.)How login works for a restricted user
1
The user logs in
They log in to the Client computer normally (locally or remotely). If secondary authentication is enabled, they enter those credentials; if an additional login message is enabled, they acknowledge it.
2
The request goes to Approvers
The request is emailed to the Approvers and appears on the Access Requests tab.
3
An Approver decides
An Approver clicks Approve (then Confirm) and the user logs in, or Deny and the login is blocked.
Related
Manage access requests
Where Approvers process all access requests.
Two-factor authentication
Add a TOTP second factor to Client logins.