

Ad-hoc reports can only be generated by a user with the administrative Viewing Monitoring Results permission. Only Clients you have the Viewing Monitoring Results permission for Clients for are available.
Generate a report
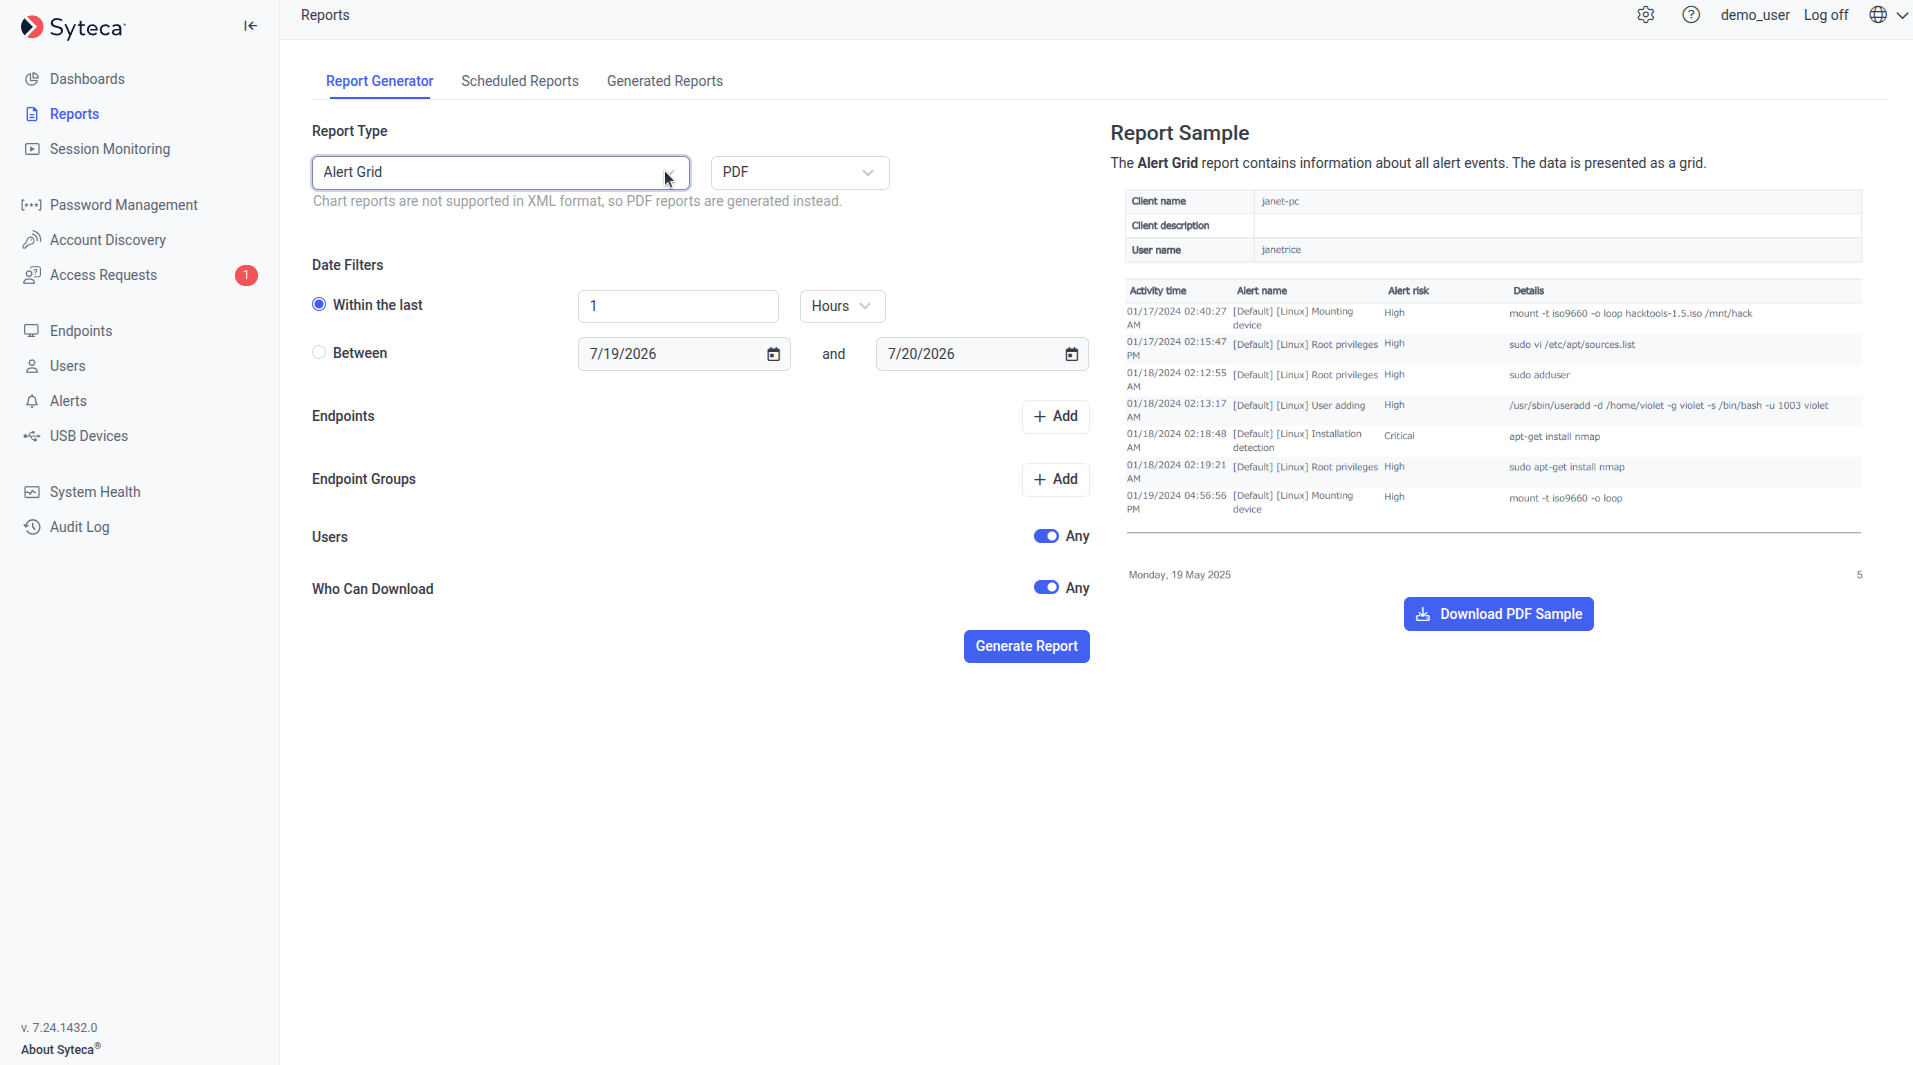
The Report Generator — pick a report type and instantly see its description and a sample preview before generating.
1
Open the Report Generator
Sign in to the Management Tool and click Reports in the left navigation. The Report Generator tab is shown by default.
2
Select the report type and format
In the Report Type section, pick the type of report and the file format.
Only one report type can be generated at a time from the Report Generator. (For multiple report types in one workflow, use a Scheduled Report rule — even if you only run it manually.)
3
Set the time period
In the Date Filters section, choose:
- Within the last (N) hours, days, or weeks, or
- Between a start date and an end date.
4
(Overtime / Outside Work Hours reports only) Set work hours
For the Overtime Work Grid and Sessions Outside of Work Hours Grid report types, the Work Hours section appears. In Generate For, pick which days of the week to include, then define the work hours for each day. All time worked outside those hours will appear in the report.
5
Select Clients and Client groups
In the Clients and Client Groups sections, click Add in each. In the pop-up, find the Clients and groups you want to include and select their checkboxes, then click Add.
6
Select users
In the Users section:
- Leave Any selected to include all users’ activity, or
- Move the toggle to the left, click Add, search for and select specific users, and click Add.
Only users whose activities have already been monitored are listed.
7
Choose who can download the report
In the Who Can Download section:
- Leave Any selected to allow all users to download the report, or
- Move the toggle to the left, click Add, search for and select specific users, and click Add.
8
Generate and download
Click Generate Report at the bottom of the page. In the Generation in Progress pop-up, click Open Generated Reports.On the Generated Reports tab, the new report appears in the top row. Once its status changes to Finished, click the Download icon next to it to save the file.
Generating a report for a long time period across many Clients can take several minutes. The report request runs in the background — you can navigate away and come back to the Generated Reports tab later.
Related
Reports overview
All 28+ report types, export formats, and the Generated Reports tab.
Scheduled reports
Recurring reports emailed automatically on a schedule.
User Activity Dashboards
Live, interactive views for exploration before deciding what to report on.
Audit log
The administrator-action log surfaced in the Audit Session Grid report.