

As a root user, the built-in default admin user has Owner Role Type permissions for every secret and folder, and can edit all secrets and folders added by other users.
The left-side menu
Resizable manually, the left-side menu has three sections.Your Secrets
Quick access to predefined folders, each showing only the secrets available to you based on your permissions:Folders
All available secrets in a tree-view folder structure:- Root folder — the top-level folder (previously called All Secrets). Every other folder is a child of it; secrets can’t be stored directly in the Root folder.
- My Secrets (your Workforce folder) — always shown first, directly under the Root folder, ahead of alphabetical order.
- Other folders — sorted alphabetically below.
Workforce folders show as My Secrets for their owner. For other users, they show as <First Name> <Last Name> (<username>) — falling back to whichever name is available, or just the username if neither exists.
Tags
The tags available for categorizing and filtering secrets — see Managing tags below.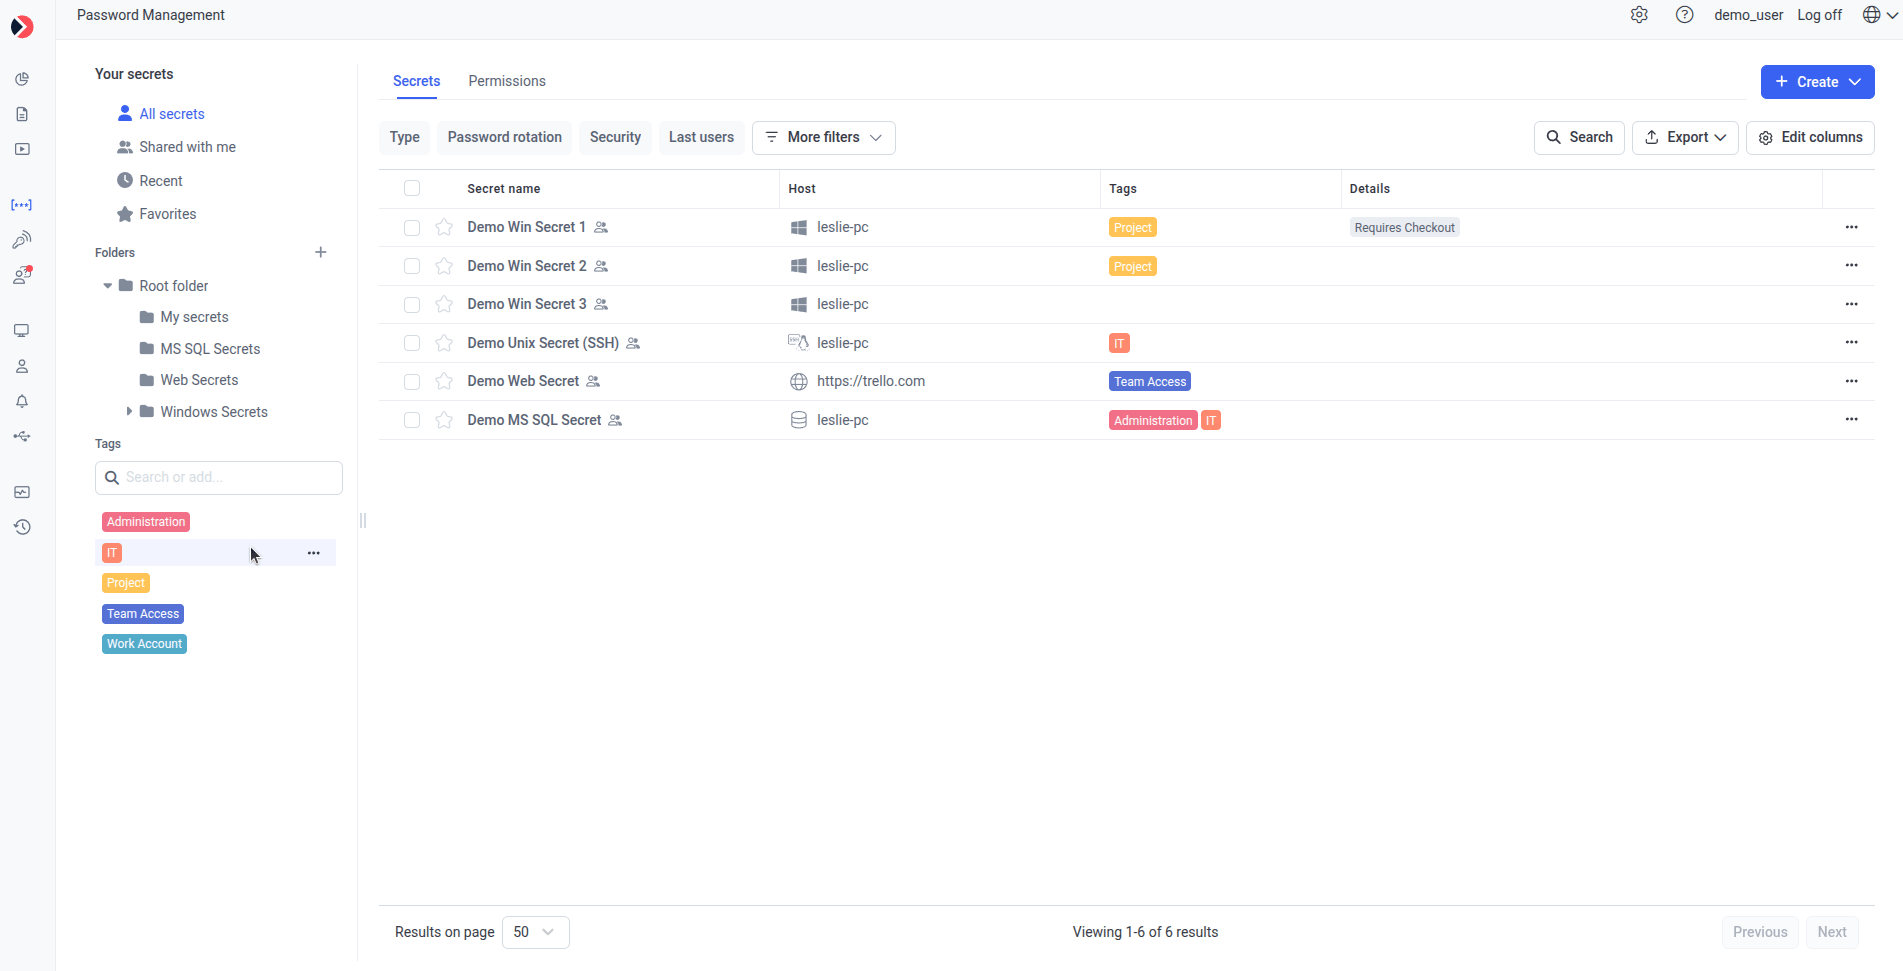
The left-side menu: Your Secrets, Folders, and Tags.
Managing folders
Add a folder
1
Click the + button
Next to the Folders section, click +. The Add Folder panel opens, adding the new folder as a child of the Root folder.
2
Set the name and description
On the Details tab, set the Folder Name and, optionally, a Description.
Folder names must be unique. A duplicate name shows: “A folder with this name already exists,” and isn’t saved until you provide a unique one.
Edit a folder
Hover the folder name and click the gear icon: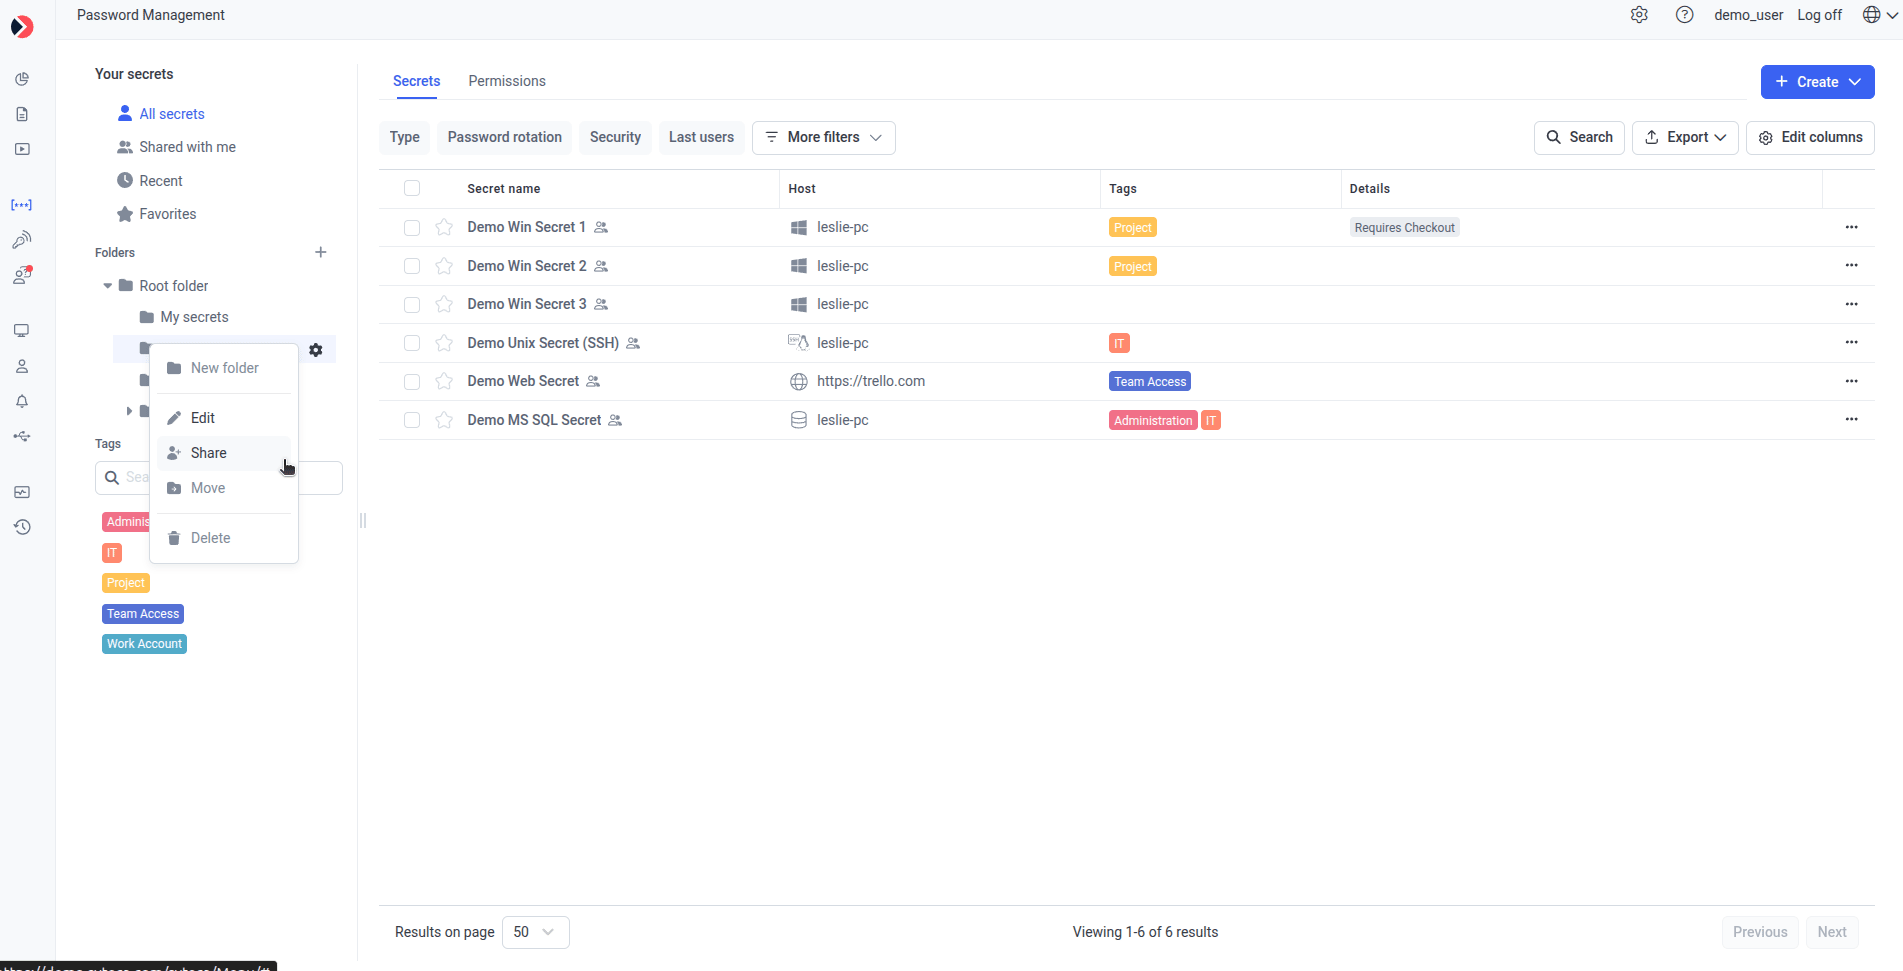
The folder gear menu.
On the Permissions tab, select Inherit users and their roles from parent folder and Inherit advanced permissions from parent folder to inherit instead of setting custom permissions. To add access, click + Add, search for and select users/groups, and click Apply — new entries default to PAM User; change via the three-dot menu next to the name (Owner, Editor, PAM User, or Remove access). See Permissions for secrets.
Delete a folder
Selecting Delete shows a confirmation:Delete Folder Are you sure you want to delete this folder, along with all the subfolders and secrets contained in it? This action cannot be undone. Type “delete” to confirm:Type
delete and click Confirm. A success message follows: “The <Folder Name> folder was deleted successfully.”
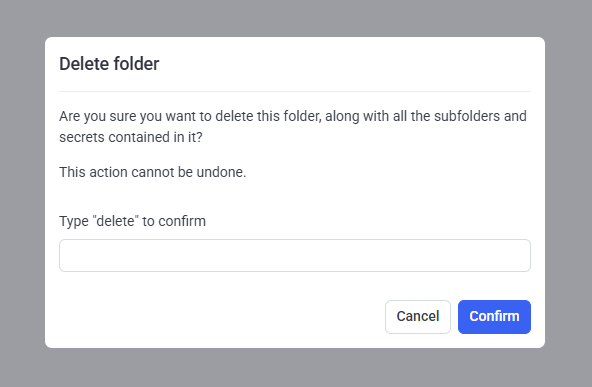
The Delete Folder confirmation dialog.
Managing tags
Tags are colored labels used to filter the secret grid. Any user with Owner, Editor, or PAM User permission can create, edit, and delete tags; everyone can view them.Create a tag
1
Start typing a name
In the Tags section’s search field, start typing the tag name (up to 50 characters).
2
Pick a color
Select a color. New tags default to gray.
3
Create it
Click +.
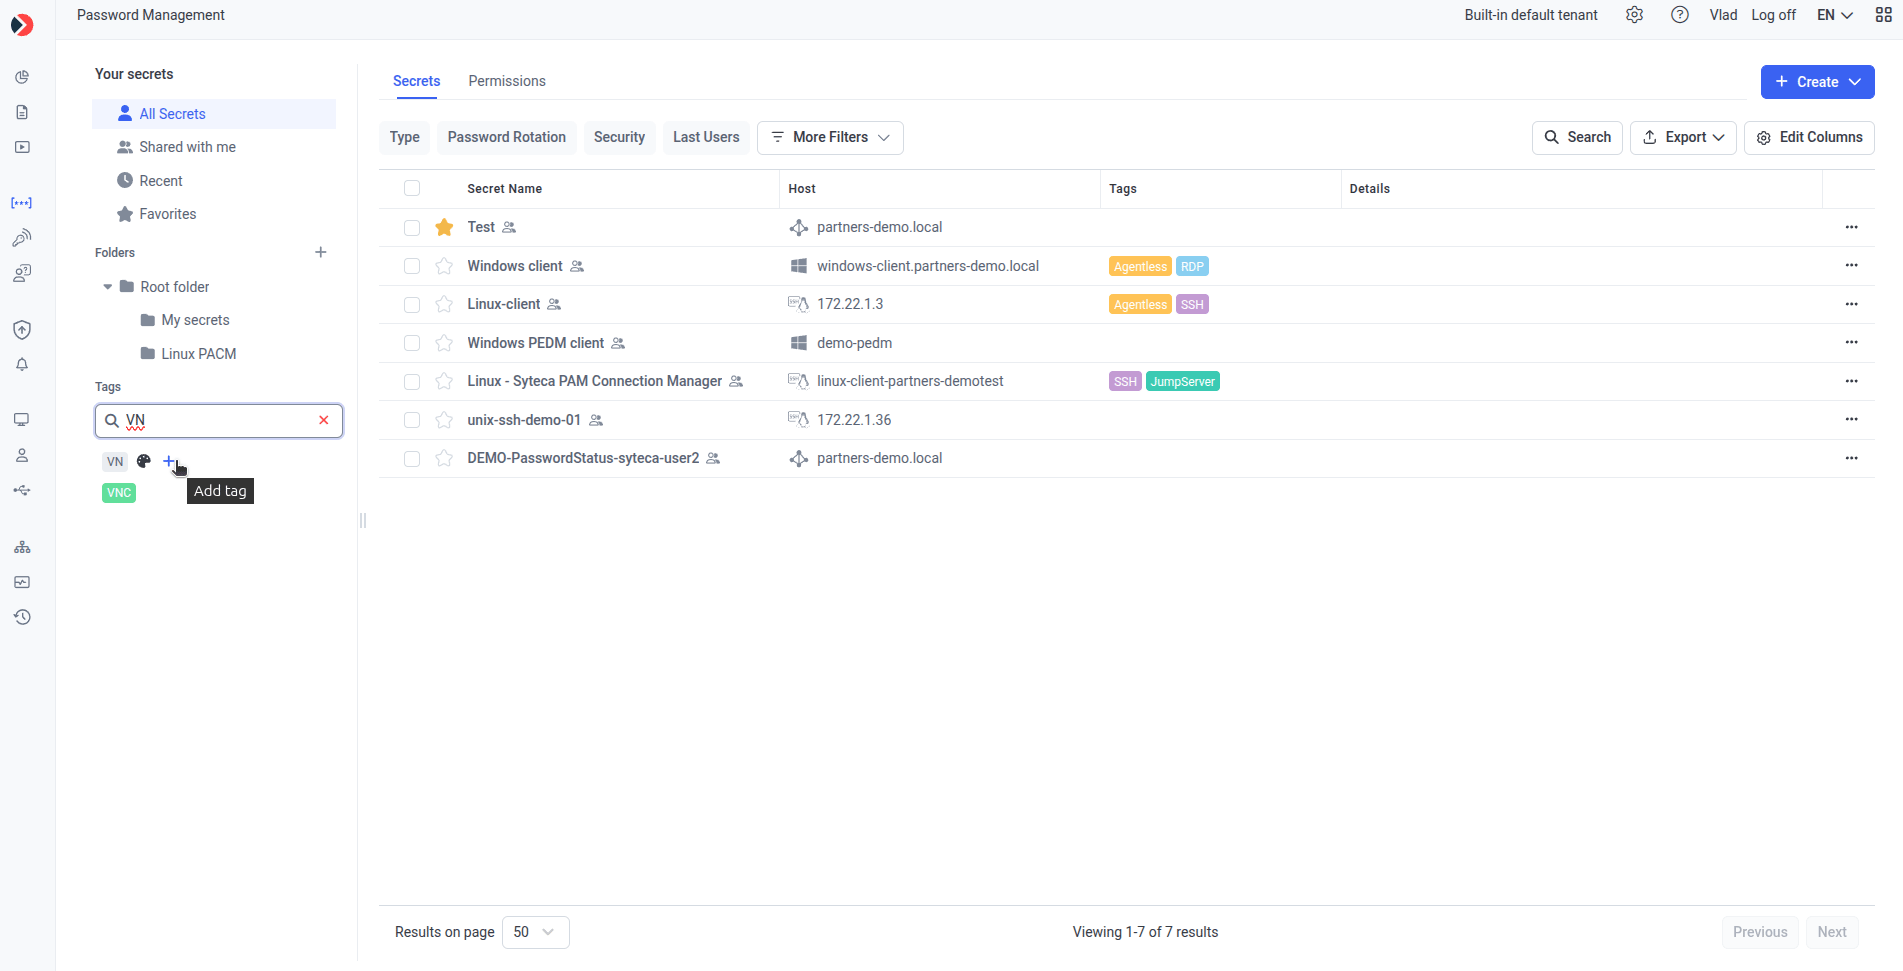
Creating a new tag.
Tag names are case-insensitive and must be unique (in Multi-Tenant mode, unique per tenant). A duplicate shows: “A Tag with this name already exists.”
Edit or delete a tag
Hover the tag and click the three-dot menu:- Edit color — opens a color picker.
- Delete — removes the tag, after confirmation.
A tag assigned to at least one secret can’t be deleted: “Tag deletion failed: the tag is assigned to one or more secrets.”
System tags
Two system tags are always shown first and can’t be deleted — they’re assigned automatically:
By default, the first 5 tags show (alphabetically, A→Z) in the left panel; a Show more… link expands the rest with a scrollbar.
Filter by tag
Click a tag in the sidebar to filter the grid to secrets that have it.- Only one tag can be active at a time — the active tag is outlined.
- Click it again to remove the filter, or click a different tag to switch.
- The folder tree doesn’t change with a tag filter applied; a folder with no matching secrets just shows empty.
The Tags section is hidden while the Permissions tab is open.
The secret grid
Default columns:After logging in, a secret’s password can be viewed and copied without re-entering your password for the first 5 minutes — and for 5 minutes after any later re-entry.
What the Details column shows
- Access approval (if required, set on the secret’s Just In Time Access tab): Allowed during working hours, Requires approval, Waiting for Approval, Approved. Expiration date/time [xx:xx], or Denied.
- Password Checkout (if enabled on the Security tab): Requires checkout or Checked out — hover for Checked out to and Auto Check-in details.
- Heartbeat (if Scheduled Heartbeat is enabled on the Automation tab): the secret’s current Heartbeat status.
- Recording: User activity will be recorded while the secret is in use, if enabled on the Security tab.
Create and launch secrets
- Create: click Create, select a secret type from the drop-down — see Add a secret.
- Launch: hover a secret and click Launch, or launch from the Secret View panel opened by clicking the secret. If more than one launch type is available (browser or local), a drop-down shows the options.
Displaying and arranging columns
These columns are hidden by default — add them via Edit Columns:- Last User (login)
- Last Usage Time
- Added By (first name)
- Description
- Password Rotation Status
- Last Rotation Time
- Check-in / Check out
- Last Heartbeat check
- Heartbeat Status
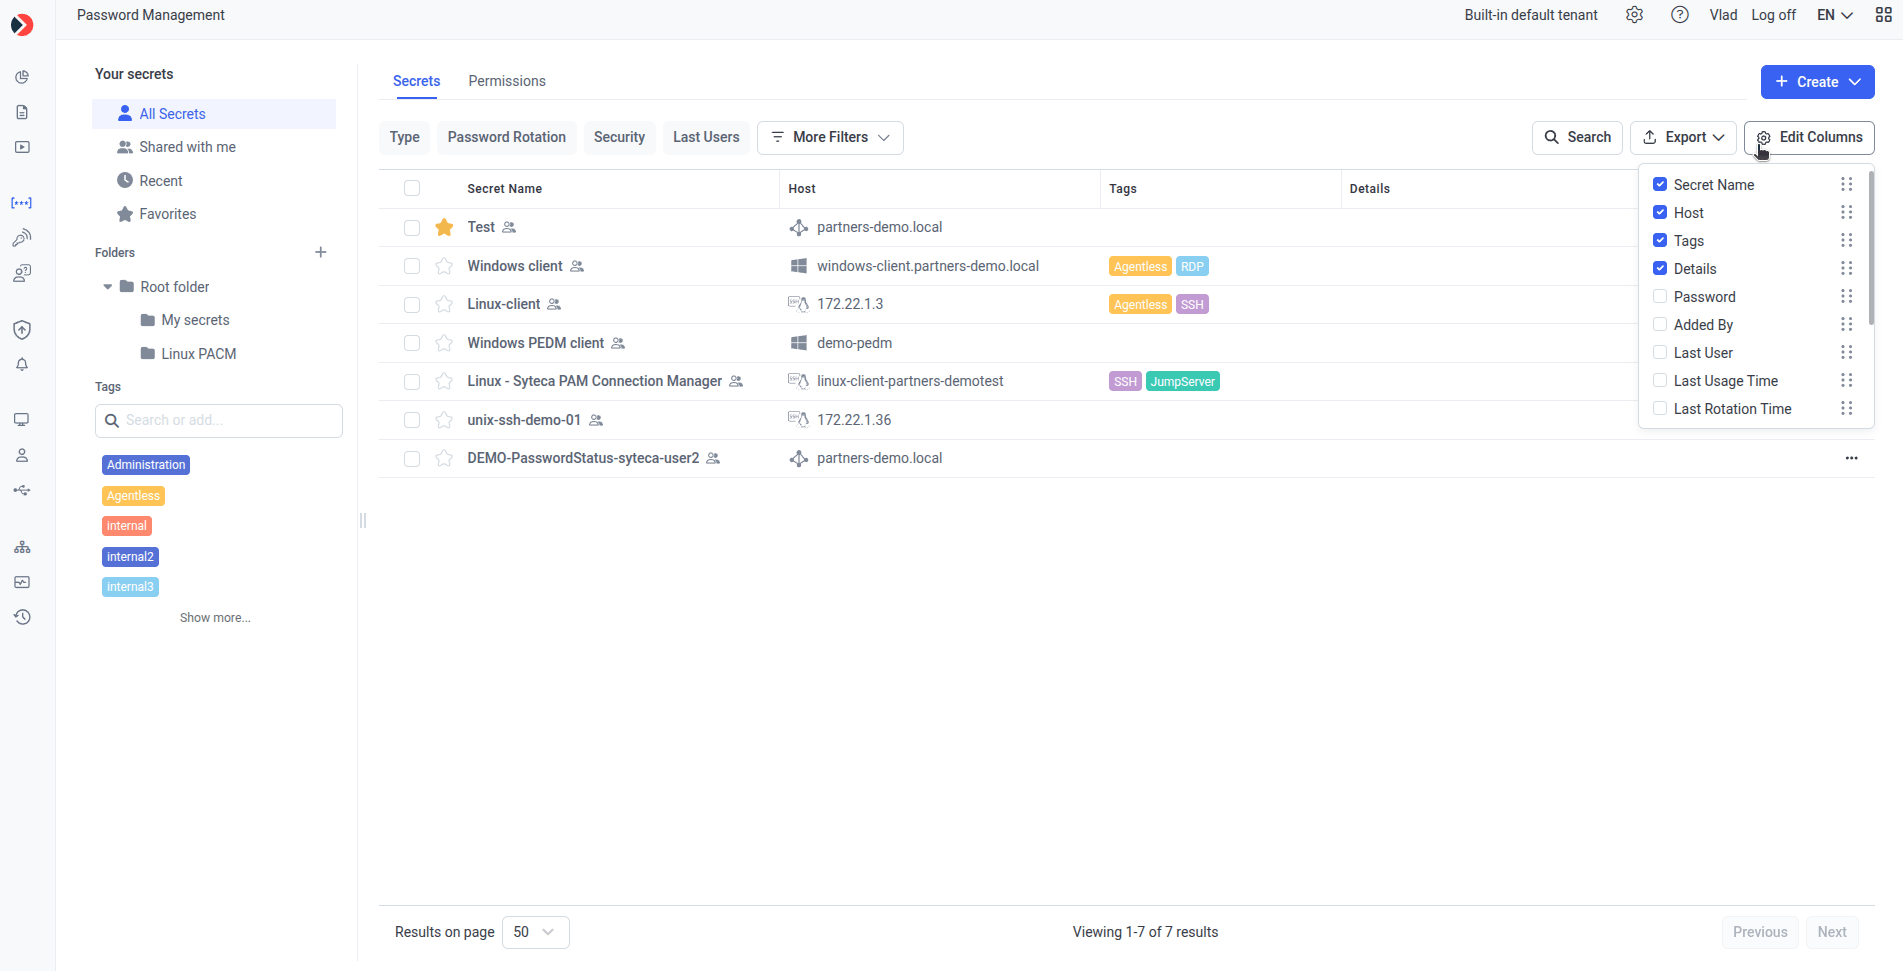
The Edit Columns panel.
The grid paginates at 50 records per page by default — change to 50, 100, or 200. The total shows as “Viewing 1–50 of <N> results.”
Actions with secrets
Click the Actions (three dots) icon on any row: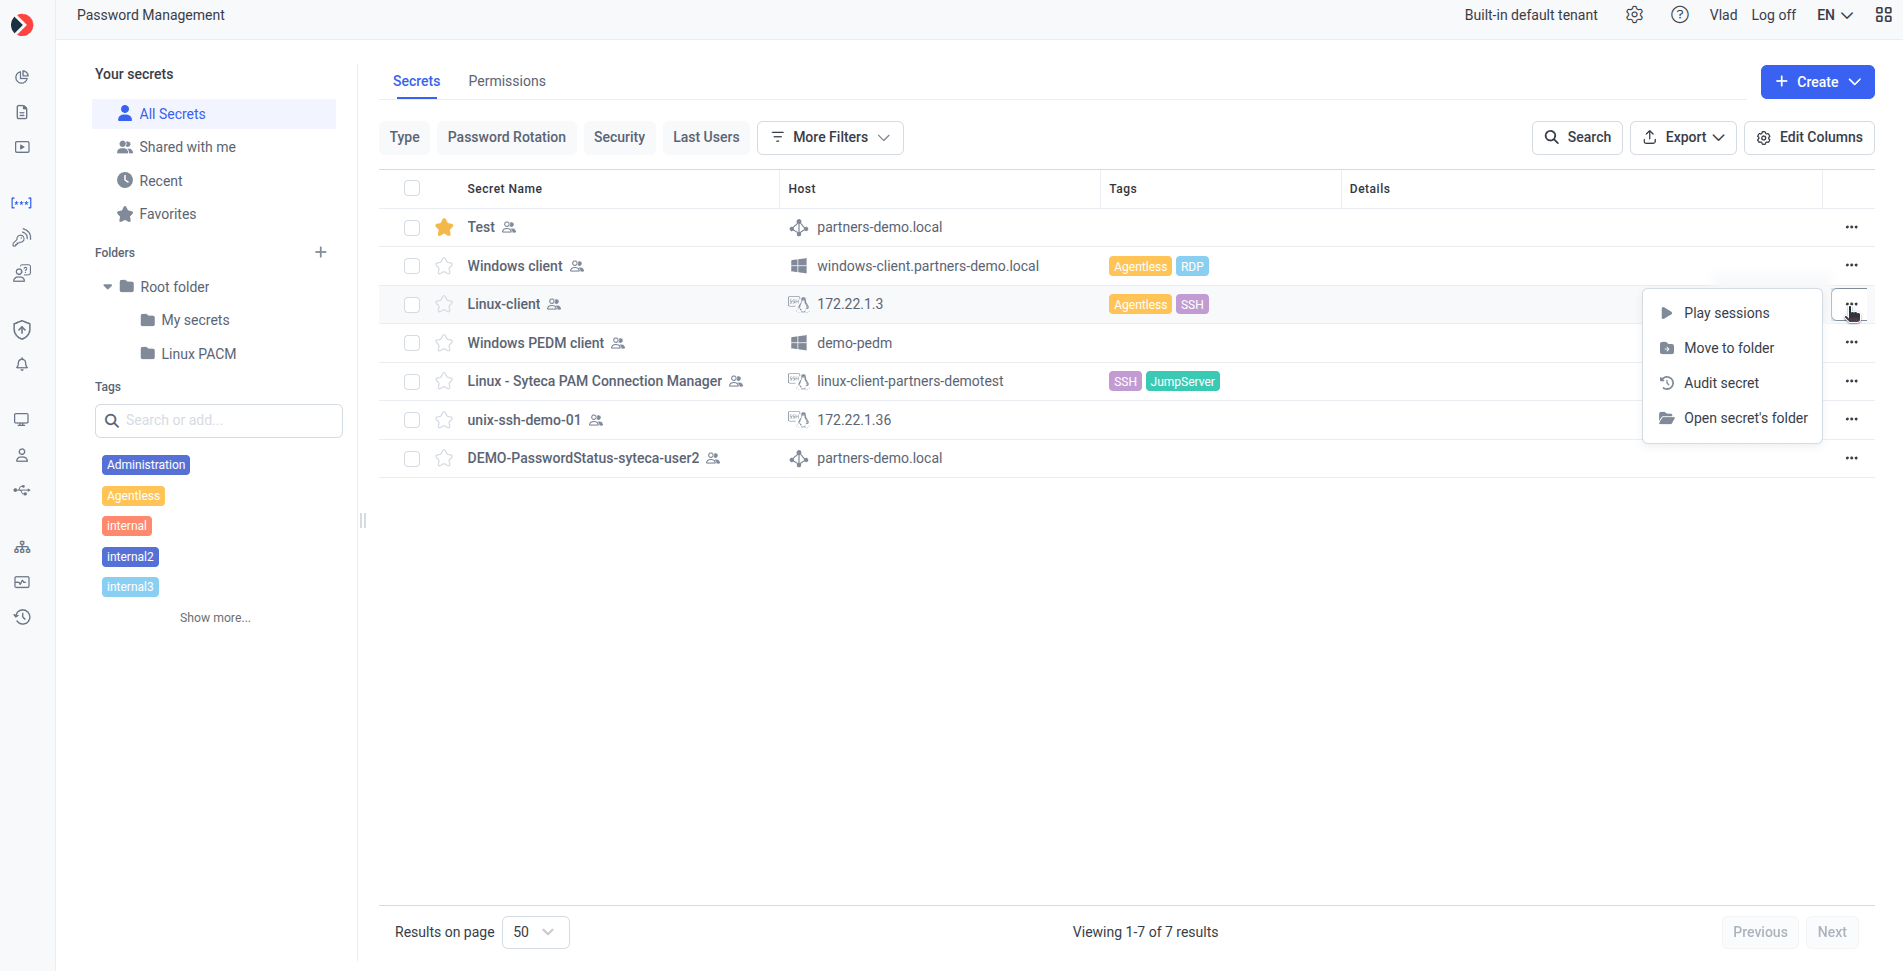
The per-secret Actions menu.
File Transfer is inactive if Change password on check in and/or Remote Password Rotation is disabled, or if the last rotation failed — hover the option for a tooltip explaining what to enable.
Bulk actions
Select one or more secrets’ checkboxes. Once at least one is selected, the bulk action bar appears (showing “<n> items selected”) with:- Delete
- Move
- Add to favorites
- Remove from favorites
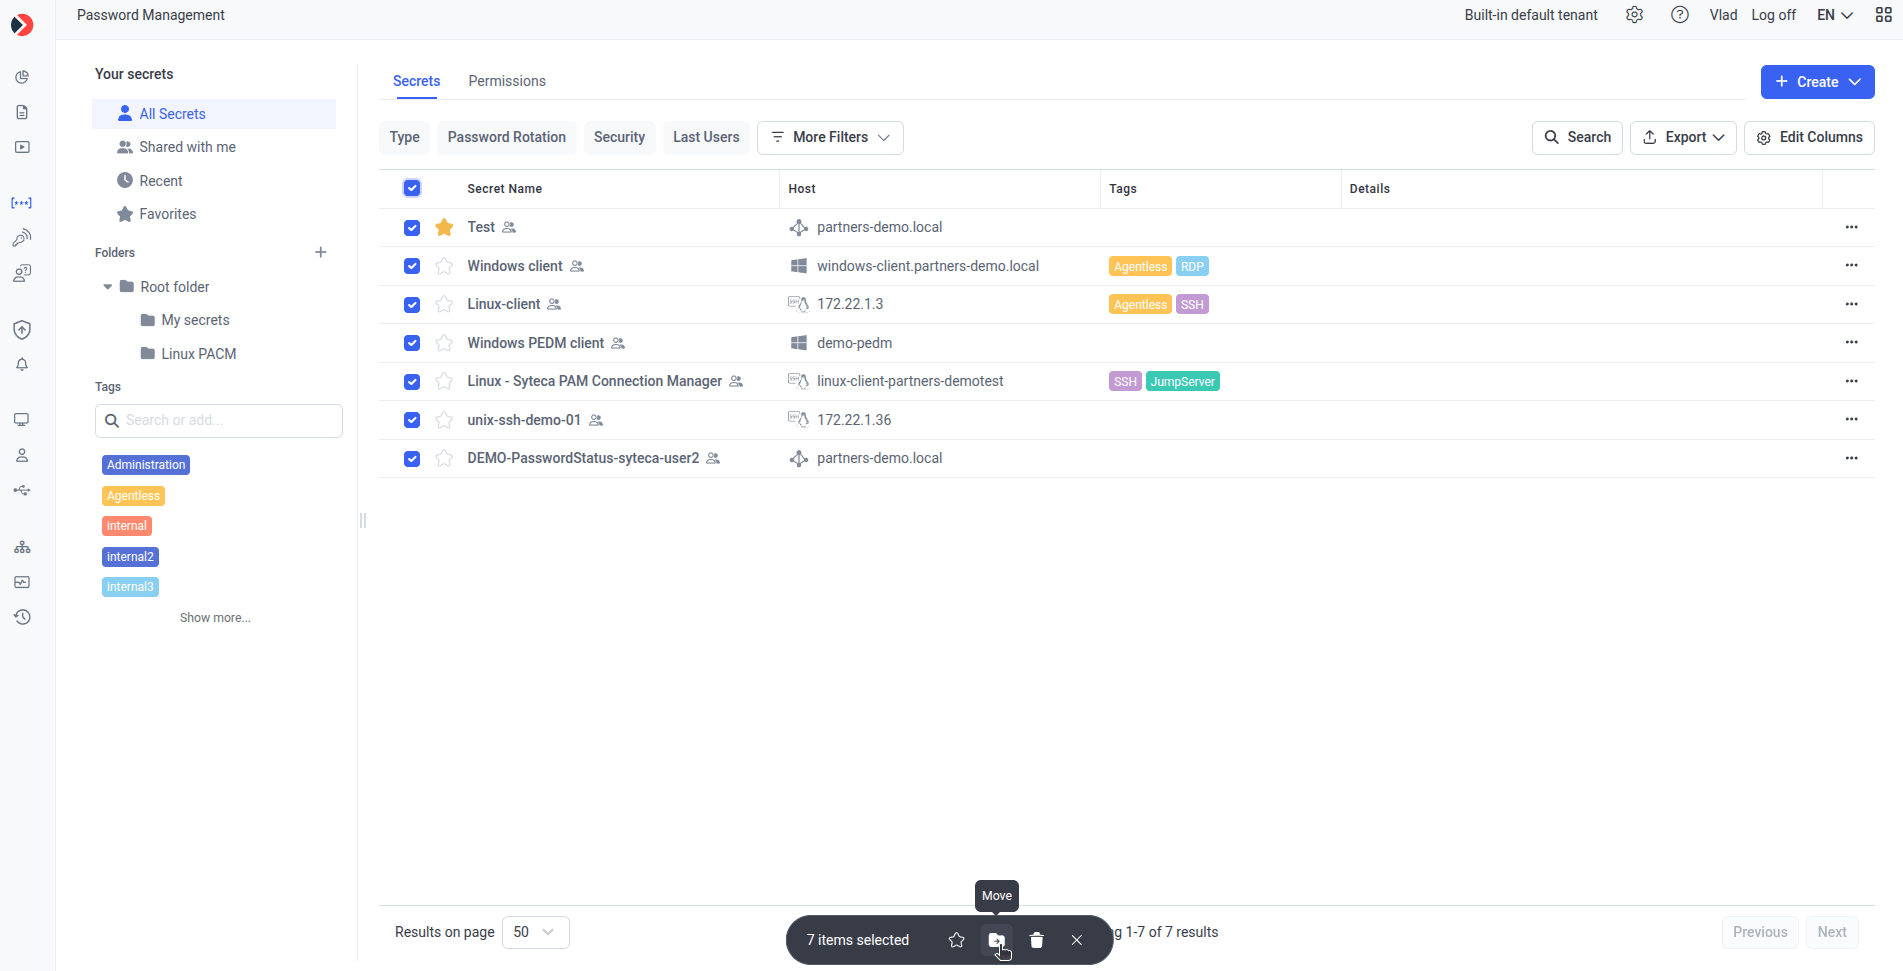
The bulk action bar.
Filtering and searching
Filters shown by default: Type, Password Rotation, Security Status, Last User. Under More filters: Last Usage, Last Rotation Time, Tags.- Clear Filters appears once any filter is applied, resetting all filters to default.
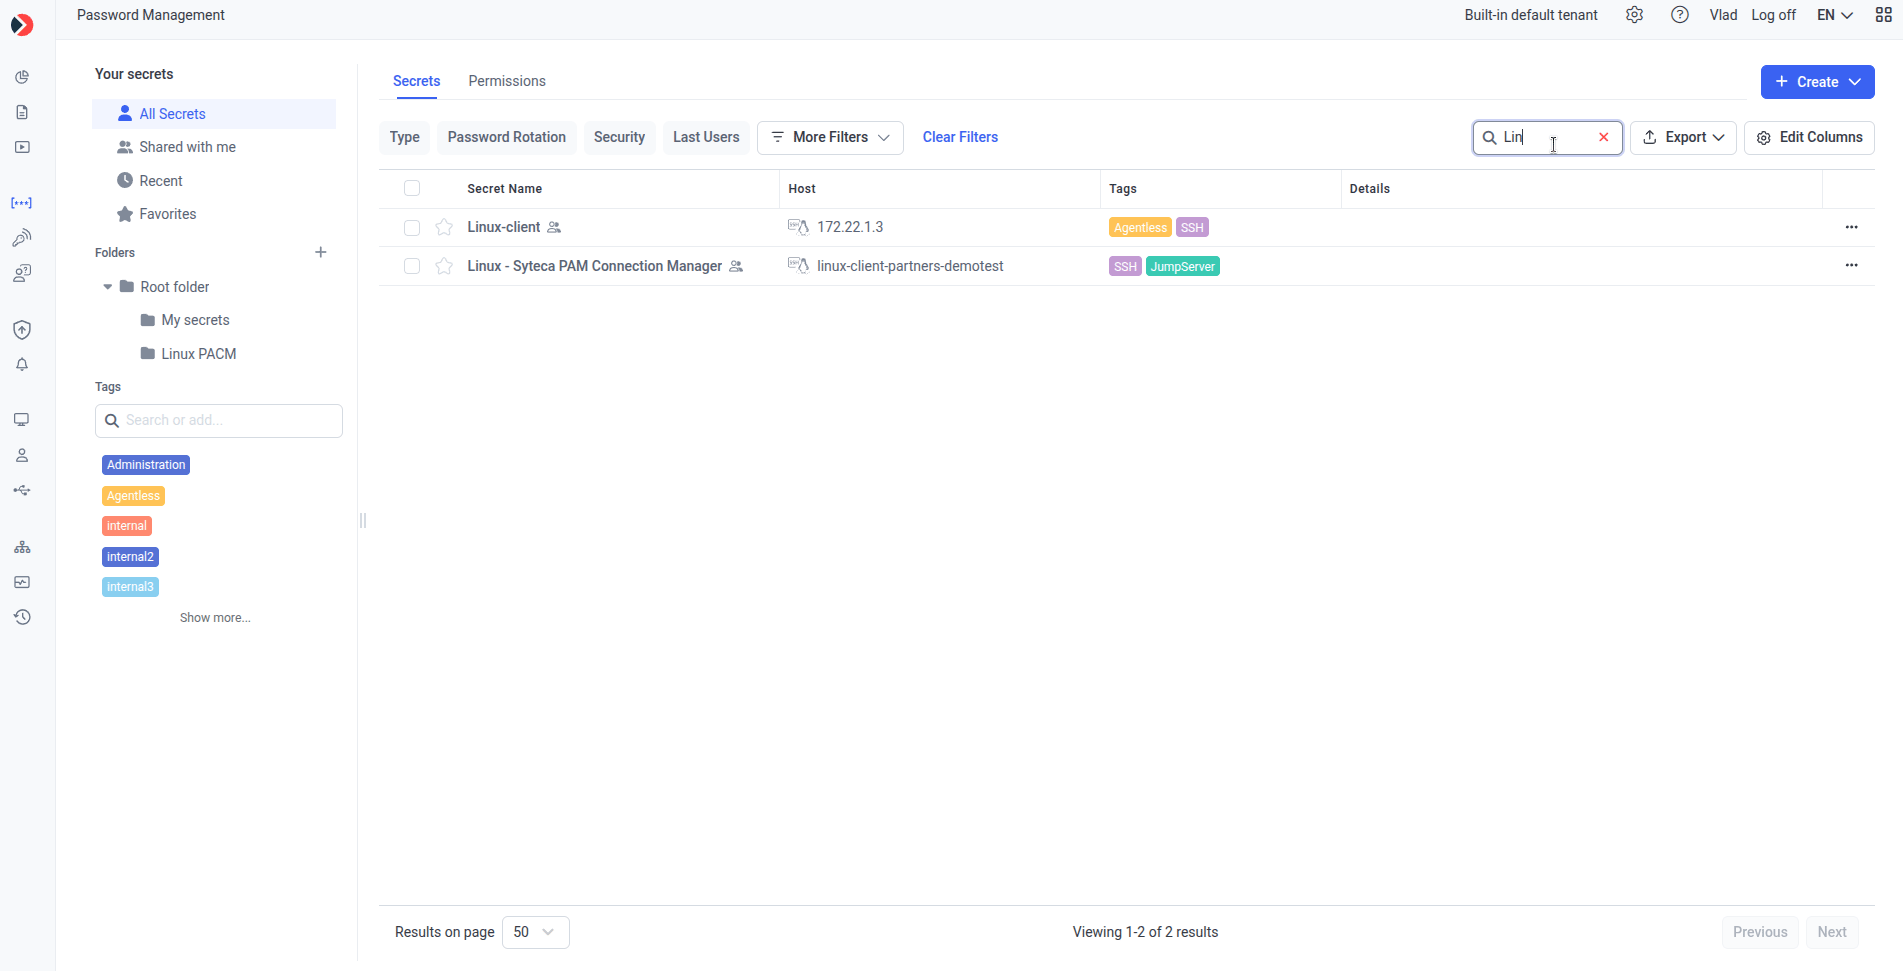
Filters and Search on the Password Management page.
Exporting secrets
Click Export and choose:- CSV (All fields) — every available field for the secrets on the page (pagination ignored).
- CSV (Current fields) — only currently visible fields, respecting applied filters and column visibility (pagination ignored).
The Password column is never exported. UI columns combining multiple attributes (for example, Secret Name with a shared-status indicator, or Host with a type icon) export as separate plain-text CSV columns, without icons or UI labels.
Related
Add a secret
Create and configure a new secret.
Edit a secret
Change an existing secret’s settings.
Permissions for secrets
Role Types and advanced permissions for secrets and folders.
Heartbeat checking
The status shown in the Details column and its own grid columns.